Last Updated on 26 Jun 2024
Securing your Bubble platform with Smart MFA
Share in

Introduction
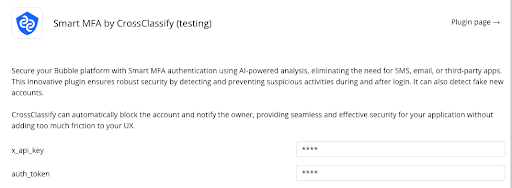
Secure your Bubble platform with Smart MFA authentication using AI-powered analysis, reducing the need for SMS, email, or third-party apps. Our innovative plugin ensures robust security by detecting and preventing suspicious activities during and after login. It can also protect your app from fake new accounts.
A single password is not enough to secure your data in Bubble. With our AI-powered Smart MFA plugin, there's no need to enter any code. CrossClassify automatically detects suspicious activities to block the account and notify the owner, providing seamless and effective security for your application. If you have a Bubble platform, you can enhance your app’s security with Smart MFA.
•
Fake account detection
•
Account takeover prevention
•
Seamless integration with Bubble applications
•
Advanced customization options for enhanced security
Let’s add CrossClassify plugin to secure your Bubble app
Overview of Smart MFA by CrossClassify
Before installing the Smart MFA plugin, ensure you have:
•
A Bubble account
•
Admin access to your Bubble application
How to install the plugin
Login to your Bubble panel and Install the “Smart MFA by CrossClassify” plugin from here.
Configuring the plugin
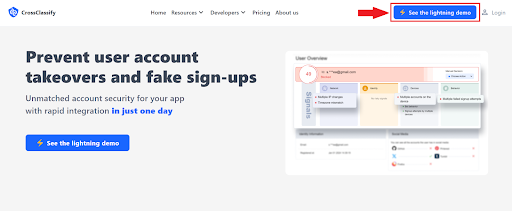
1. Visit https://www.crossclassify.com/ and click “See how it works”.
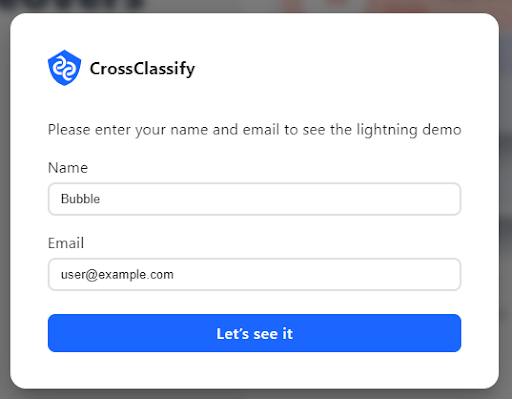
2. Enter “Bubble” as Name with your email address.
3. Check your email for the API key sent by CrossClassify.
4. Navigate to the Plugins tab in your Bubble app and go to "Smart MFA by CrossClassify" to set up the necessary API key that we emailed to you.
Utilizing the plugin on sign-up and login pages
Before going to add Init-CrossClassify action, If you don’t have a signup/login page then follow this link to create it and then continue.
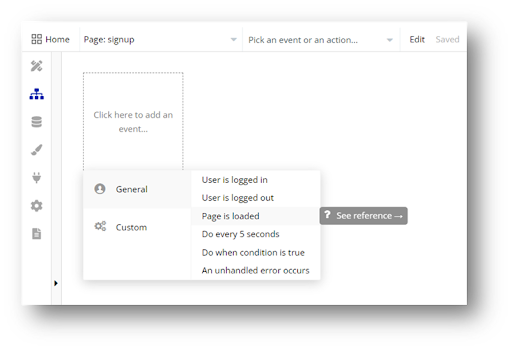
Adding Init-CrossClassify action on page load
1. Click on the “Workflow” icon from the left-hand side menu.
2. Click to add a “Page is loaded” event.
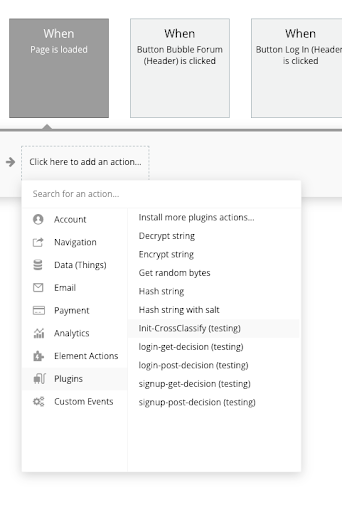
3. Add “Init - CrossClassify” action to the page is loaded event from the Plugins menu item.
After adding “Init-CrossClassify” action to the page load of the Signup/Login page, you have successfully added CrossClassify SDK to your bubble app. Now, you need to add your elements like email and password input fields and make them available to CrossClassify for user behavior tracking.
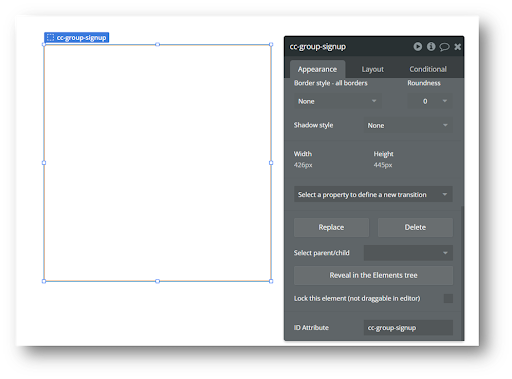
Creating group element
Creating a group element with the designated (Signup form:"cc-group-signup", Login form:"cc-group-login")
Within this group, you can include input fields for email and password, facilitating seamless user integration tracking.
Note: Enable ID attribute from Setting -> General -> Advance option -> Expose ID attribute to HTML element. ID attribute is not enabled by default.
Creating form fields and submit button
Create a signup/login button labelled with the ID (Signup button:"cc-signup-btn", Login button:"cc-login-btn")

How to test plugin and see the results
•
Create a test user account in your app to verify sign-up and login processes.
•
Monitor the MFA process and ensure it works correctly.
•
Check the plugin logs for any issues or successful verification events.
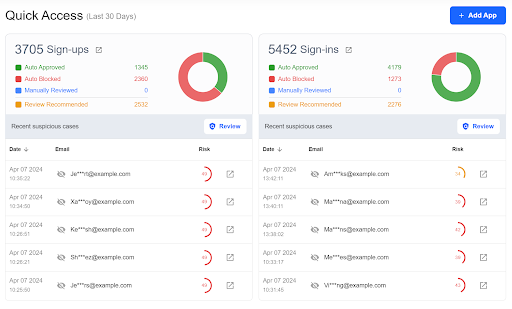
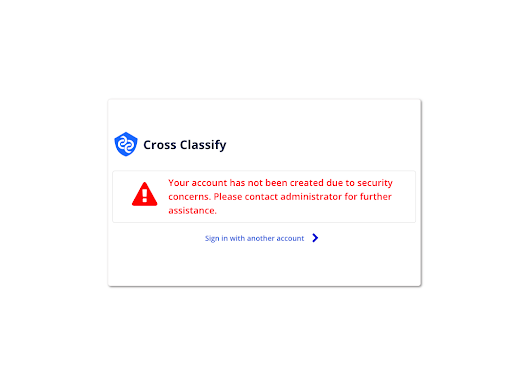
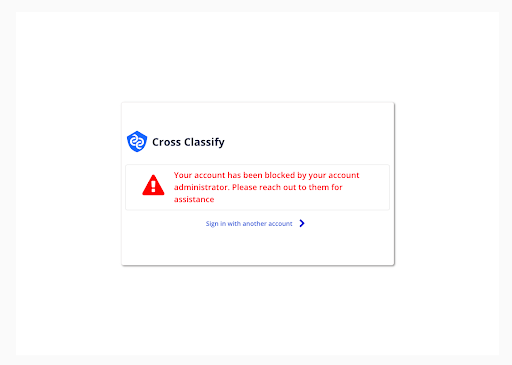
CrossClassify protects your app using a concept called behavioral metrics. The following image is the example of these metrics for a blocked account in CrossClassify dashboard in the screenshot below.
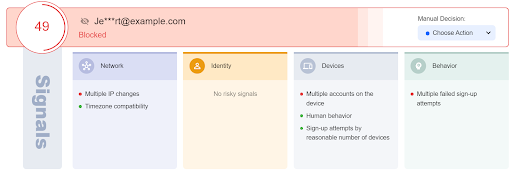
You can see the results and blocked users in the CrossClassify Panel after sign-up.
Plugin actions
Init-CrossClassify
The Init-CrossClassify action plugin is designed to seamlessly integrate the CrossClassify SDK into your Bubble no-code platform. This plugin enables you to track user interactions effectively, allowing for advanced fraud detection and prevention. By initialising CrossClassify, you can monitor and analyse user behavior, ensuring robust security for your application without the need for traditional methods like SMS or email verification.
Login-post-decision
The Login-Post-Decision action plugin initiates the decision-making process for a user after login by providing their email address. This action generates a unique decision ID, which can be used in subsequent Get-Decision actions to verify and track user activities.
Login-get-decision
The Login-Get-Decision action plugin retrieves the risk level and block status of a user by providing a decision ID. This action assesses the login attempt and returns a“risklevel” categorised as high, medium, low, or unready, along with a boolean value indicating whether the user “isblocked” (true or false). By employing this action, you enhance the security of your application by leveraging CrossClassify's fraud detection capabilities, ensuring that each login attempt is thoroughly evaluated for potential risks.
Signup-post-decision
The Signup-Post-Decision action plugin initiates the decision-making process for a user during the sign-up phase by providing their email address. This action generates a uniquedecision ID, which can be used in subsequent Signup-Get-Decision actions to verify and track user activities.
Signup-get-decision
The Signup-Get-Decision action plugin retrieves the “risklevel” and “isBlocked” status of a user during sign-up by providing a decision ID. This action assesses the sign-up attempt and returns a “risklevel” categorised as high, medium, low, along with a boolean value indicating whether the user “isblocked” (true or false). It includes a timeout of approximately 30 seconds to fetch the result. By using this plugin, you can make informed decisions based on the analysis of user behavior, ensuring a secure and reliable sign-up process for your Bubble application.
Create a sample app
Demo of project: Sample App
Fake account detection
We can use this plugin to detect fake accounts during sign-up.
In this scenario, we'll guide you through the signup process and demonstrate how you can use the CrossClassify plugin to enhance your user experience.
Step 1: Config sign-up page
In the initial step, you'll add and configure the signup page, and then establish a connection to the CrossClassify plugin.
On this page, you need to pass your email and password to the verify page which can used to sign up. To make everything more secure you need to make a hash a password and send it as a params to the verify page:
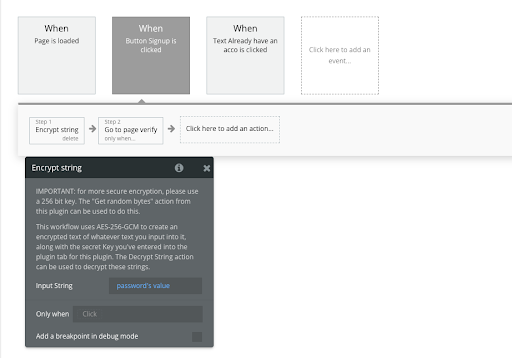
You can use any plugin you want to hash the password in this example we have used the “Encrypt & Decrypt Text” plugin

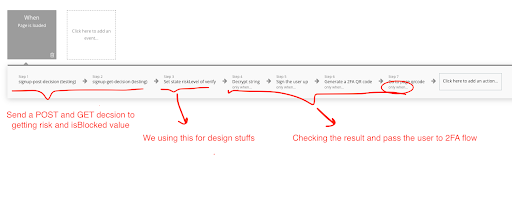
Step 2: Create a verification page
In this step, you'll create a verification page to facilitate the exchange of information with the CrossClassify backend (using a POST request followed by a GET request) to GET a decision on whether this account is considered fake or not.
After obtaining a result, proceed to sign up the new user and proceed to the MFA flow, or login page, or any other view depending on your target user journey.
Step 3: Create a verification workflow
Let's structure an example of the verification workflow after receiving the hashed user email and password from the signup page:
Step 4: Pass the user to login
In this scenario, you'll await the decision result before allowing user entry. Thus, if a user encounters a security issue during signup, access can be denied to prevent them from creating an account or accessing their existing one. After all actions, you need to send the user to the login page.
Alternatively, in another scenario, such as the login page, you can proceed without waiting for a decision result.
Account takeover prevention
We can use this plugin to detect account takeovers during login.
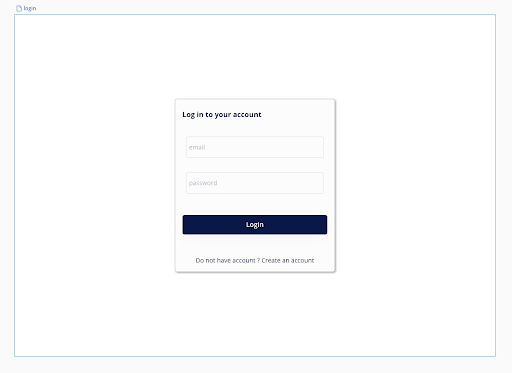
Login page scenario
In this scenario, we'll guide you through the login process without waiting to verify the user.
Step 1: Config sign-up page
In the initial step, you'll need to add and configure the login page, and then establish connections with the CrossClassify plugin.
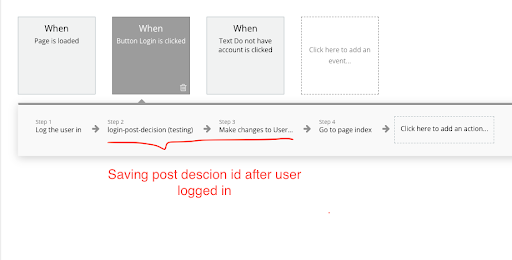
Step 2: Save post decision ID
In this step, it's crucial to save the post ID for future use. By doing so, you can retrieve it whenever necessary, such as during any page load, and use it as a parameter to retrieve the final decision status of the user. Therefore, after successfully logging in to the user on the login page, I ensured to execute this task.
Step 3: Using get decision on page loads
In this step, you have the option to utilise the "get decision" function to retrieve the user's risk level and whether they're blocked. Based on this information, you can determine whether to impose limitations or take any other necessary actions if the user is flagged as suspicious.
For example, in the index page, we sent the user to the block page if the user was suspicious:

Conclusion
By integrating CrossClassify Smart MFA into your Bubble platform, you can significantly enhance the security of your applications. This AI-powered solution offers robust protection against suspicious activities, account takeovers, and fake account creation, ensuring a seamless user experience. Take the next step to secure your Bubble app today and focus on growing your business with confidence.
Share in
More integrations